In part one of my resizing images post (how to resize images on a PC) I discussed why it is so important to resize an image before uploading to a website. Basically its going to make it quicker for you and quicker for your users. This tutorial will show you how to resize an image on a Mac for sending via email or uploading to a web server.
How to resize then email with iPhoto
- Open your photo in iPhoto. If you haven’t added the photo(s) to iPhoto just find the file. Click on it then hit spacebar. This will show the image with preview. You will see two buttons down the bottom, the second button allows you to Add to iPhoto. Click this
 .
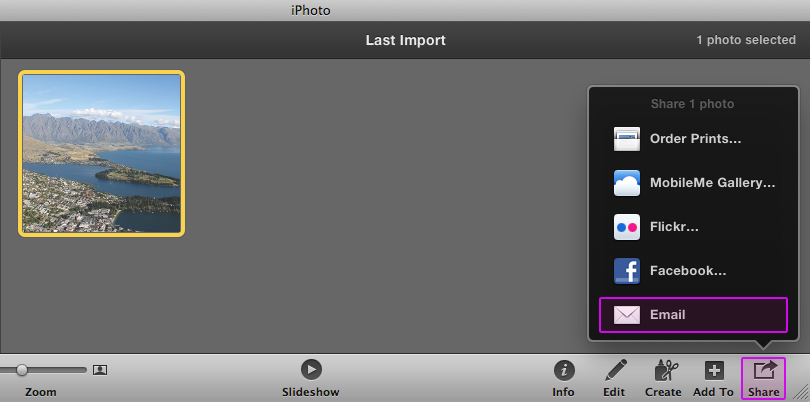
. - Select your photo(s) in iPhoto then click on the share button in the bottom right and choose Email. This will bring up a window with options for emailing. Follow the prompts and send!

Thats great if you want to email the photo to someone but if you want to save a copy with a smaller file size for uploading then that won’t suite. Now lets export a copy as low res.
How to save a low resolution copy of your image
Using iPhoto
- Open your photo in iPhoto.
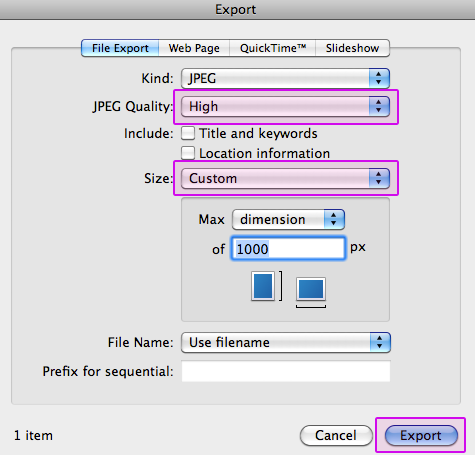
- Go to File > Export.
- Set the quality to high. Under size choose custom. 1000px is a good maxium width but you might want it lower if your design has specified a size for you.
- Press export to save the file to a new location.

Using Preview
- Double click on the image in your finder to open with Preview.
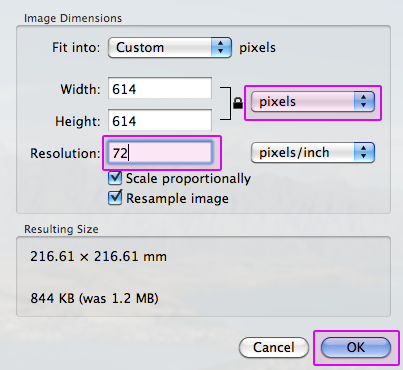
- Go to Tools > Export.
- Set the dimension type to pixels, changing the width/height to be less than 1000 pixels.
- Set the resolution to 72.
- Press ok then choose File > Save As to make a copy so you don’t loose the hi res image.

