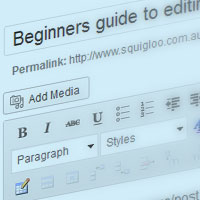
WordPress is a content management system that allows you to edit the content of your website. It has been designed to be simple and easy to use but if you haven’t worked with website editing before doing some of the simple tasks can be daunting or confusing. In this blog post I will share some tips to get you started.
The following the tips apply to editing pages and posts (in WordPress 3.5):
Make sure you can see all the formatting options
When you view a page/post in edit mode you will see bunch of formatting options for your content. The default WordPress set up will only show one row of options. If you press the kitchen sink button this will expand the editing options to show multiple rows.
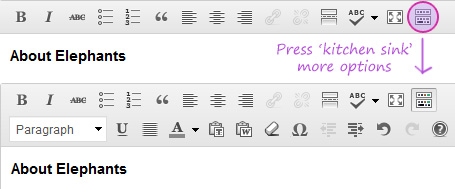
(Note some WordPress developers will incorporate additional formatting tools so your setup may differ from the screen shot included here.)
Using paragraphs and headings
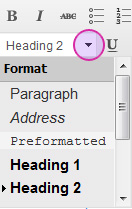 Now that you can see more formatting options you should see a paragraph/heading drop down menu. To apply a heading just place you cursor on the line of text you want to change to a heading or paragraph. Then choose the heading type from the drop down menu. Headings/paragraphs will apply to the entire block of content.
Tip: If you are using Firefox you can use Ctrl + 1 keys to apply heading 1, Ctrl + 2 for heading 2 and so on.
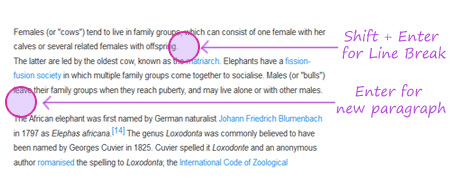
Next line without a new paragraph
When your press enter (return on mac) you will create a new paragraph. Depending on the set up of your specific website, this usually means you will get a nice gap between each paragraph. This is designed to make it easy to read. However sometimes you want text to go to the next line without starting a new paragraph. To do this you need to do a ‘soft return’ to create a line break rather than a new paragraph. To do this on a PC press Shift + Enter keys. On a mac press Shift + Return. Soft returns can be used anywhere you want content to go to the next line without changing the formatting or creating a new paragraph.
Working with numbered and bullet point list
To make make a numbered or bullet point list you first need to make sure each point is on its own line. Then select the text you want to convert. Press ![]() Unordered list for a bullet style or
Unordered list for a bullet style or ![]() Ordered list for numbered. If you want text to go to the next line without a bullet point then use a soft return (see previous tip).
Ordered list for numbered. If you want text to go to the next line without a bullet point then use a soft return (see previous tip).
Help – when I make some text a heading all the text changes to be a heading
You cannot mix heading types and paragraph text together on one line. A heading needs to be on its own line. If you change some text to a heading and the paragraph text also becomes a heading it means you have used a line break instead of starting a new paragraph. To solve this situation. Click at the end of you heading text. Press delete until the paragraph text appears on the same line. The press enter (or return on mac) to start a new paragraph. Now that the text is correctly separated you can make your heading text a heading.
Including Tables
There are basically two ways you can include tables in your content. You can copy paste content that is already in a table format. Or you can ask your web developer to include table formatting options in the editor tools. The table tools will allow you to a new tables and edit existing ones.
Creating links
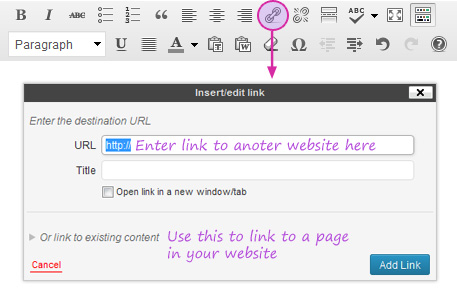
To create a link you first need to select the content you want to be a link. Then click on the link icon. This will bring up a little pop-up which you can use to enter the link.
Creating an email link
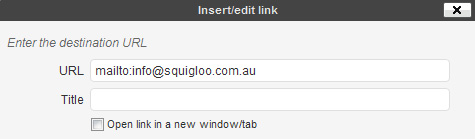
To make a link to an email address follow the previous steps to bring up the link popup. Then in the URL field enter “mailto:” followed by the email address. Eg: mailto:info@squigloo.com.au.
Linking to a PDF file
To link to a PDF file (or any other file) you first need to upload the PDF file to your website. You can do this via the Media uploader or just press Add Media. Follow the prompts to upload your file. Once it has uploaded the file you should be give a File URL. Copy this URL – it will be what you link to. Then select the text you want to be a link. In the link URL field paste in the PDF file URL.
Adding images
Basically you want to use the Add Media button to insert an image into post. Follow the prompts to upload the image or choose from your existing uploads. Then choose the options to set the alignment and size. If you would more help with this I would suggest watch this you tube video title How To Add Pictures and Videos To WordPress 3.5 for a comprehensive guide and demonstration.
The content of the web page doesn’t appear in the WordPress editor.
WordPress gives developers lots of different options for where they can store content. When you press edit page or post you will get content which web developer has made as part of that particular page or post. Additional information which you see on the page, such as text on the side of the page, the menus or footer text can be stored in many different ways. It might be a menu or a widget or it could be part of the template files. It’s best to consult your web developer here to find out how to edit other content your page.